
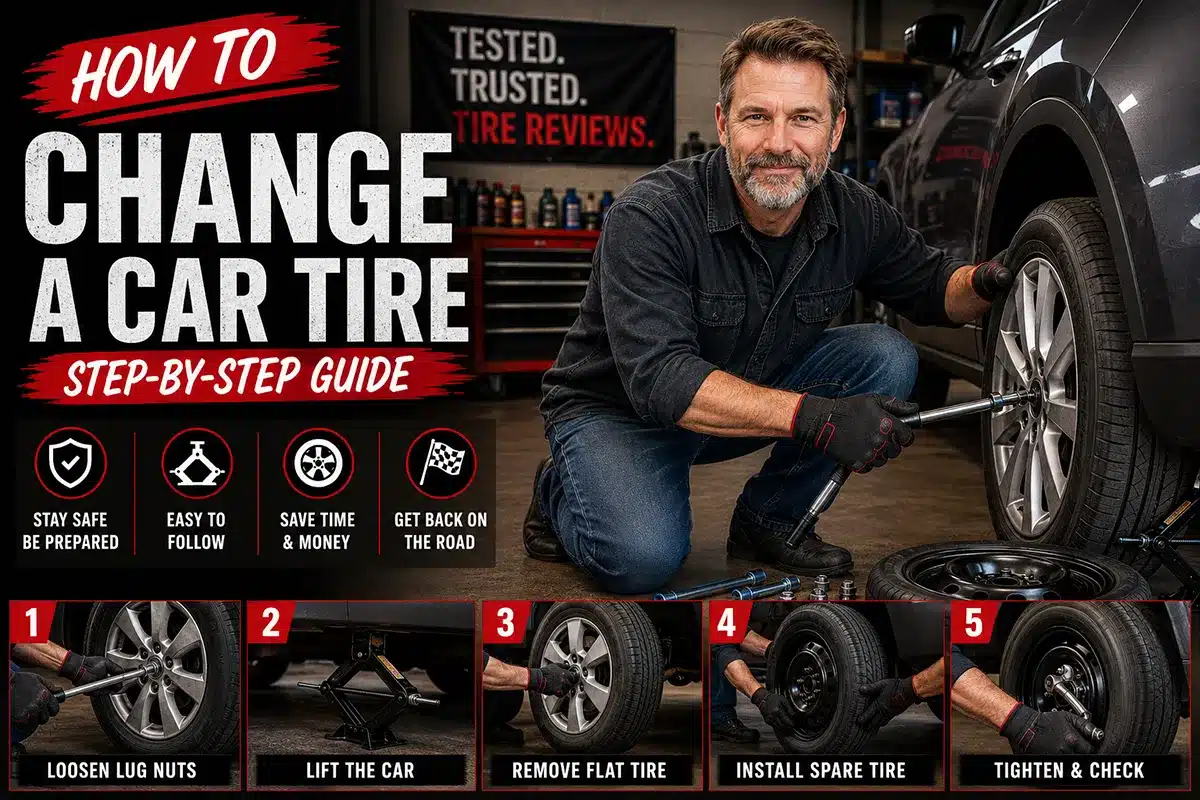
I’ve been covering tires professionally for years, but the day I actually needed to change one — on a rain-slicked I-95 off-ramp in Virginia with two kids in the back seat — is when I understood what “knowing how” really means. The theoretical knowledge was there. The calm execution under pressure? That took practice.
TL;DR:
Changing a car tire takes about 15–30 minutes if you have the right tools and follow the steps in order. Pull safely off the road, loosen the lug nuts before jacking the car up, raise the jack to the correct contact point, swap the tire, torque the lug nuts in a star pattern, and get to a shop within 50 miles if you’re on a compact spare. That’s the short version. The full version — the one that’ll actually keep you safe — is below.
- Why You Should Know This Even If You Have Roadside Assistance
- What You’ll Need Before You Start
- Step-by-Step: How to Change a Car Tire
- Step 1: Get to Safety First — Before Anything Else
- Step 2: Get Your Spare and Tools Out
- Step 3: Loosen the Lug Nuts — While the Car Is Still on the Ground
- Step 4: Position the Jack Correctly
- Step 5: Raise the Vehicle
- Step 6: Remove the Flat Tire
- Step 7: Mount the Spare Tire
- Step 8: Tighten the Lug Nuts — In a Star Pattern
- Step 9: Lower the Vehicle and Final Torque
- Step 10: Check Pressure, Stow Your Gear, and Go
- Compact Spare vs. Full-Size Spare: What You’re Actually Working With
- When to Skip the DIY and Call for Help
- Preventing Flat Tires in the First Place
- Frequently Asked Questions
- Quick Reference Checklist
- Final Thoughts
Why You Should Know This Even If You Have Roadside Assistance
Let me be honest: if you have AAA or your automaker’s roadside assistance, calling them is a perfectly reasonable choice. Wait times vary, but in most suburban and urban areas you can get someone out in 30–45 minutes.
But here’s the reality I’ve lived through and heard from readers constantly — roadside assistance isn’t always fast, coverage isn’t always reliable in rural areas, and there are situations (a quiet country road at night, a remote stretch of highway, a time-sensitive trip) where knowing how to do this yourself is genuinely valuable.
More practically: if your spare is flat, if your jack is missing, or if you try to loosen lug nuts after the car is in the air, things go wrong fast. Understanding the process means you also know how to check your equipment before you need it in an emergency.
What You’ll Need Before You Start
Before we get into the steps, let’s talk tools. Your car should have come with most of these from the factory, but it’s worth checking your trunk before you need them.
Standard equipment (should already be in your car):
- Spare tire (full-size or compact/”donut”)
- Scissor jack or hydraulic jack
- Lug wrench (usually a cross-wrench or L-shaped bar)
- Vehicle owner’s manual (for jack points)
What I’d recommend adding to your trunk:
- Torque wrench (even a basic click-type, 80–120 ft-lb range)
- Reflective safety triangles or LED road flares
- Nitrile gloves (one pair)
- A small flashlight or headlamp
- A can of tire inflator/sealant (Fix-a-Flat) for minor punctures
- A rubber mallet (helps if the wheel is stuck to the hub)
- A small piece of 2×6 wood plank (stabilizes the jack on soft ground)
I keep all of this in a small canvas bag in my trunk. The whole kit weighs maybe eight pounds and has saved me — and helped strangers — more times than I can count.
Step-by-Step: How to Change a Car Tire
Step 1: Get to Safety First — Before Anything Else
This is the step most guides rush through, but it’s the most important one. When you feel a flat (the car pulls hard to one side, the steering goes spongy, or you hear that unmistakable flapping), your first instinct might be to stop immediately. Don’t.
Keep driving slowly — even on a flat rim — until you can reach:
- A parking lot
- A wide highway shoulder with good visibility
- A flat, paved surface away from traffic
A damaged rim is a $150–$400 replacement. Getting hit on a narrow shoulder is life-threatening. The math is easy.
Once stopped:
- Turn on your hazard lights immediately
- Put the car in Park (or in gear if manual)
- Apply the parking/emergency brake
- Place safety triangles behind the vehicle — at least 50–100 feet back, more on a highway
If you’re on a highway and the situation feels genuinely unsafe, stay in your car with your seatbelt on and call for help. No tire change is worth standing in live traffic.
Step 2: Get Your Spare and Tools Out
Open your trunk and locate your spare tire. On most sedans and crossovers it lives under a cover in the trunk floor. On trucks and some SUVs, it’s mounted underneath the vehicle or on the rear door.
Pull out:
- The spare tire
- The jack
- The lug wrench
- Your owner’s manual (you’ll need this for the jack point locations)
Important: Check your spare’s pressure before you need it. A compact spare should be inflated to 60 PSI — they lose pressure over time just sitting in your trunk. Make it part of your regular tire pressure check routine.
Place the spare tire flat on the ground near the flat tire. This serves two purposes: it’s ready to install, and it acts as a visual reminder to grab it.
Step 3: Loosen the Lug Nuts — While the Car Is Still on the Ground
This is the step people most commonly get wrong. Do not jack the car up first.
With the wheel still on the ground, the tire’s friction against the road keeps the wheel from spinning. Once the car is in the air, you’re fighting physics.
Use your lug wrench (or a breaker bar if lug nuts are particularly stubborn) and turn counterclockwise — that’s left to loosen. Apply your body weight if needed; these are usually torqued to 80–100 ft-lbs at the shop.
Loosen each lug nut about one full turn — just enough to break the initial resistance. Don’t remove them yet.
Pro tip: If lug nuts won’t budge, slip a 12–18 inch section of metal pipe (a “cheater bar”) over the lug wrench handle for extra leverage. This is common on older vehicles or if someone over-torqued them at the last rotation.
Step 4: Position the Jack Correctly
This step can cause real damage to your car if done wrong. The jack must contact a reinforced metal point on the vehicle’s frame or subframe — not the sheet metal of the door sill, not the plastic rocker panel, not the exhaust.
How to find your jack points:
- Open your owner’s manual and look for “jacking” or “tire changing”
- Most vehicles have notched metal points along the pinch weld (the seam under the door) or designated puck-shaped reinforced spots
- Many modern cars have small rubber “pads” along the rocker panel — these are your jack points
For scissor jacks (the type most cars come with), place the jack head directly under the reinforced point closest to the flat tire. For floor jacks, use the center of the front subframe or the rear differential housing (see your manual).
If you’re on soft ground (dirt, grass, gravel), place your small wood plank under the jack base to distribute the weight and prevent the jack from sinking.
Step 5: Raise the Vehicle
Using the lug wrench in the jack’s socket (for scissor jacks) or your floor jack handle, raise the vehicle slowly. Most scissor jacks have a socket at the end of the wrench that fits over the turning mechanism.
Raise the vehicle until the flat tire is approximately 6 inches off the ground — enough clearance to remove the flat and install the (slightly larger, because inflated) spare.
Check stability: Before you put any part of your body near or under the vehicle, give it a firm push from the side. It should not rock or shift. If it wobbles, lower the car and reposition the jack.
Never put any body part under a car supported only by a scissor jack. This is a rescue jack for emergencies, not a work jack. If you need to do anything under the car, use proper jack stands.
Step 6: Remove the Flat Tire
Now fully remove all the lug nuts. Put them somewhere they won’t roll — into a cup holder, your pocket, or a hubcap laid face-up on the ground.
Grip the flat tire by the tread (not the rim edges — they can be sharp) and pull it straight toward you. It should slide off the wheel studs. Some vehicles, especially those in snow-belt states, can have the wheel seize to the hub from rust and corrosion.
If the wheel is stuck:
- Lower the car slightly so the tire just touches the ground
- Give the sidewall a firm kick with your heel (not a delicate kick — a real one)
- Or tap the inside of the tire with a rubber mallet
- Raise the car again and try pulling once it breaks free
Lay the flat tire flat on the ground under the vehicle near the jack. This is a safety measure — if the jack fails for any reason, the flat provides a few extra inches of protection.
Step 7: Mount the Spare Tire
Lift the spare tire and align the holes in the wheel with the threaded studs on the hub. This is easier with two people but very doable solo.
Trick for solo installs: Brace the spare against your thigh as you guide it onto the studs — gravity does most of the heavy lifting once the first stud is through.
Push the wheel fully onto the hub until it’s flush against the rotor/brake drum.
Step 8: Tighten the Lug Nuts — In a Star Pattern
Thread the lug nuts on by hand first. Never use the wrench initially — you want to feel that the threads are catching cleanly, not cross-threading.
Then tighten with the wrench using a star pattern (not clockwise or counterclockwise around the circle). The star pattern ensures even seating against the hub:
    1
  5   2
  4   3
For a 5-lug wheel, it looks like you’re drawing a star. Tighten each nut to about 50% of final torque in the first pass.
Do not fully torque yet — the wheel is still in the air.
Step 9: Lower the Vehicle and Final Torque
Lower the car slowly until the tire contacts the ground — but don’t let the full weight onto it yet. With the tire touching but the jack still bearing some load, do a final tightening pass in the same star pattern.
Then lower the car fully and remove the jack.
Now do your final torque pass. If you have a torque wrench, most passenger cars require 80–100 ft-lbs (check your owner’s manual — it’s in there). If you’re using a lug wrench by hand, put your full body weight on it and it’s usually close enough for a short drive to a shop.
Step 10: Check Pressure, Stow Your Gear, and Go
Before you pull away:
- Verify the spare looks properly inflated (no obvious sidewall bulge or excessive deflection)
- If you have a portable tire inflator, check the pressure — compact spares need 60 PSI, full-size spares need whatever the vehicle placard specifies (usually 35–36 PSI for passenger cars)
Stow the flat tire, jack, and lug wrench in your trunk. The flat can often go back in the spare well. Don’t leave anything loose in the trunk — an unsecured jack becomes a projectile in a panic stop.
Finally, get your wheel properly torqued at a shop. Hand-tightening or roadside torquing is almost never perfectly accurate. Most shops will re-torque a wheel for free or a few dollars.
Compact Spare vs. Full-Size Spare: What You’re Actually Working With
Most passenger cars sold in the United States since the mid-1990s come equipped with a compact temporary spare — sometimes called a “donut.” It’s smaller, lighter, and cheaper to manufacture than a full-size spare. But it comes with real limitations you need to respect.
| Feature | Compact Spare (“Donut”) | Full-Size Spare |
|---|---|---|
| Max Speed | 50 MPH | Same as regular tires |
| Max Distance | 50–70 miles | No specific limit |
| ABS/ESC Function | May be impaired | Normal |
| Fits in Spare Well | Yes | Only if same size |
| Cost to Replace | $80–$150 | $150–$300+ |
My strong recommendation: If you drive rural routes regularly or take long road trips, consider keeping a full-size matching spare in your trunk or truck bed. Yes, it’s heavier and takes more space. But I’ve had readers stuck in areas where no shop within 50 miles could source their tire size same-day.
Also worth noting: some newer vehicles don’t include a spare at all. Run-flat tires and tire mobility kits (a can of sealant + compressor) are increasingly standard on performance-oriented cars and EVs. If this is your situation, the mobility kit only works for minor punctures in the tread — a sidewall blowout or a major failure requires a flatbed.
When to Skip the DIY and Call for Help
I’m a proponent of self-reliance, but there are situations where calling for help is the right call:
Call roadside assistance if:
- The flat is on the driver’s side in active traffic with no shoulder
- Your spare is also flat or missing
- It’s dark, you’re alone, and the road feels unsafe
- You have a blowout at highway speed and suspect suspension damage
- The vehicle is a heavy-duty truck or van and you lack proper equipment
- You’re physically unable to perform the steps safely
There’s no shame in this. Roadside assistance exists precisely for these situations.
Preventing Flat Tires in the First Place
Since I review tires for a living, I’d be remiss not to address prevention. Most flat tires are predictable and avoidable.
The most common causes I see:
- Underinflation over time — tires naturally lose 1–2 PSI per month. Check pressure monthly, not just when the TPMS light comes on.
- Worn tread — thin tread has less resistance to road debris puncturing through. Replace tires before they reach 2/32″ depth.
- Curb damage — repeated light curb contact weakens sidewalls invisibly. You often won’t know until a failure happens.
- Old tires — rubber degrades regardless of tread depth. Most manufacturers recommend replacement at 6 years regardless of mileage; 10 years is the absolute maximum.
- Ignoring slow leaks — a tire losing ½ PSI per week has a puncture somewhere. Get it inspected before it becomes a roadside emergency.
Check your tires every time you fill up. It takes 60 seconds and is the single highest-return maintenance habit you can build.
Frequently Asked Questions
How long does it take to change a tire?
With practice, 15–20 minutes is realistic. Your first time might take 30–40 minutes, and that’s completely normal. The important thing is doing it correctly, not quickly.
Can I drive on a flat tire at all?
You can drive very slowly (under 5 MPH) for a short distance to reach a safe spot off the road. Driving any further risks destroying the tire, damaging the rim, and potentially losing control. The goal is safety, not saving the tire.
Do I need to replace a flat tire or can it be repaired?
Punctures in the center tread area that are smaller than ¼ inch (6mm) in diameter can typically be repaired with a proper plug-and-patch for $15–$30. Punctures in the shoulder or sidewall cannot be safely repaired — the tire must be replaced. Any tire that’s been driven on while flat also needs replacement regardless of where the puncture is.
Does changing a tire damage the wheel studs?
Not if done correctly. Cross-threading lug nuts can damage studs — which is why you always start them by hand. If a stud is already damaged, you’ll feel resistance when threading by hand. Stop, remove the nut, and inspect before proceeding.
My TPMS light came on — does that mean I have a flat?
The TPMS system typically triggers when a tire drops 25% below its recommended pressure. That could be a slow leak, seasonal temperature drop (tires lose about 1 PSI per 10°F drop in temperature), or a flat in progress. Check all four tires with a gauge before driving. If one is visibly low, inspect for the cause before simply re-inflating.
Is it okay to use Fix-a-Flat instead of changing the tire?
For small tread punctures, tire sealant/inflator products can get you to a shop. However, they contaminate the inside of the tire and can complicate professional repair. Many shops charge extra to clean it out. Use it as a last resort when changing the tire isn’t possible, and tell the shop what you used.
What if I don’t have a lug wrench?
A socket set with a ½-inch drive and the correct socket size (most commonly 17mm, 19mm, or 21mm) with a breaker bar will work. In a true emergency, some service stations will loan tools. This is also an argument for keeping a proper lug wrench in your trunk — the factory one is often inadequate for heavily torqued nuts.
Quick Reference Checklist
Here’s a printable summary you can keep in your glove box:
- ✅ Pull to a safe location — flat, away from traffic
- ✅ Hazard lights on, parking brake engaged
- ✅ Place safety triangles behind the vehicle
- ✅ Get spare, jack, and lug wrench from trunk
- ✅ Loosen lug nuts before jacking (one full turn only)
- ✅ Position jack at correct vehicle jack point
- ✅ Raise vehicle 6 inches, check stability
- ✅ Remove lug nuts and flat tire; slide flat under car
- ✅ Mount spare on wheel studs
- ✅ Hand-thread lug nuts, then snug in star pattern
- ✅ Lower car to ground, final torque in star pattern
- ✅ Check spare pressure, stow gear
- ✅ Drive to shop — especially if using a compact spare
- ✅ Get wheels re-torqued professionally
Final Thoughts
Changing a tire isn’t difficult, but it requires doing things in the right order and respecting the safety steps that are easy to skip when you’re stressed on the side of the road. The goal is to do it calmly, systematically, and safely — not quickly.
I’d genuinely recommend doing a dry run at home in your driveway before you need to do it for real. Get your spare out, find your jack points, practice loosening and tightening a lug nut. It takes 20 minutes and will make an enormous difference when the situation actually happens.
And please — check your spare pressure today. Not next week. Today. I can’t tell you how many people have had a perfect tire change kit in their trunk, only to discover the spare was at 12 PSI.
Have questions about a specific car or tire situation? Drop them in the comments — I read every one.
Related reads on thetirereviews.com: