
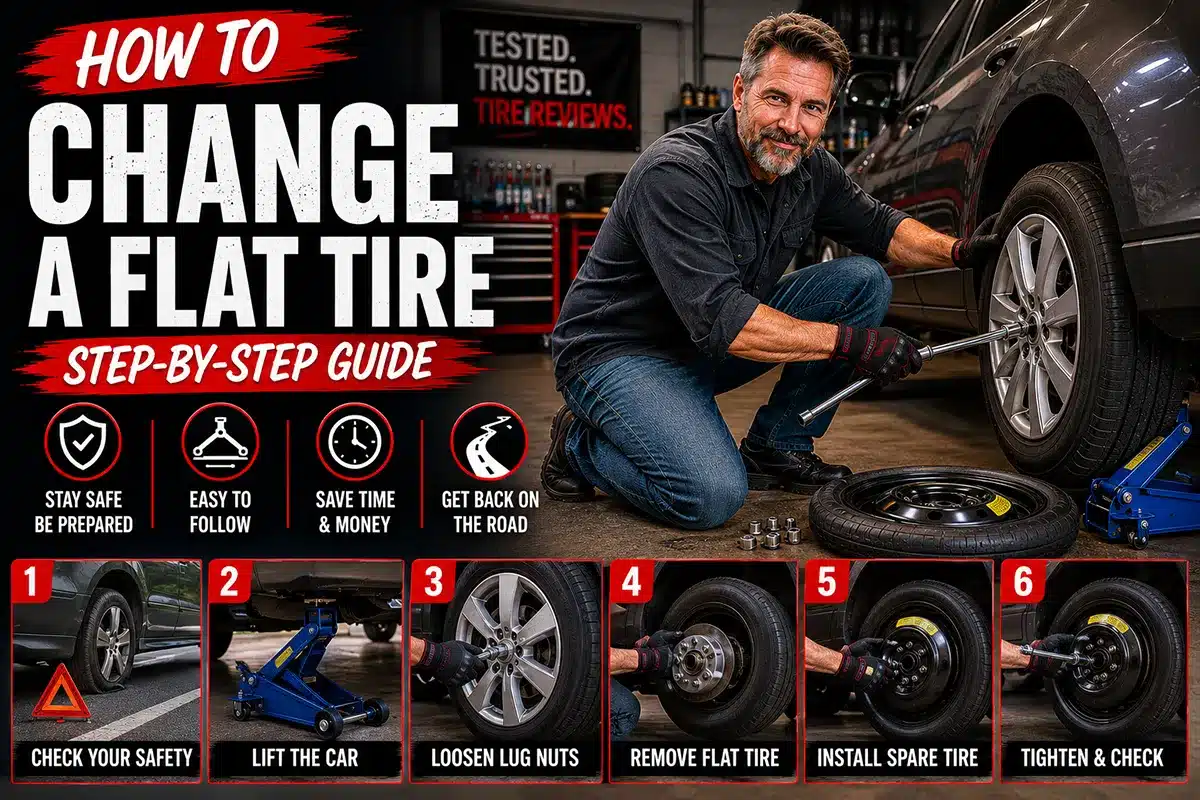
I’ve changed tires in 95-degree heat on the shoulder of I-95, in a grocery store parking lot in January, and once — memorably — in a downpour outside Asheville, NC. Not once did I have the luxury of reading a perfectly formatted how-to guide while it was happening. That’s exactly why I wrote this one, so you don’t have to wing it.
TL;DR:
Pull safely off the road, turn on hazards, gather your tools (jack, lug wrench, spare), loosen lug nuts before jacking, raise the car, swap the tire, hand-tighten in a star pattern, lower the car, fully torque the lugs, and get the flat looked at ASAP. Keep reading for every detail that actually matters, including the mistakes most people make under pressure.
- What This Guide Will (and Won’t) Cover
- Before You Ever Need This: The Preparedness Check
- What You’ll Need to Change a Flat Tire
- Step 1: Get to Safety First — Don’t Rush the Stop
- Step 2: Set Up Your Safety Zone
- Step 3: Get Your Equipment Out
- Step 4: Loosen the Lug Nuts Before You Jack
- Step 5: Position the Jack Correctly
- Step 6: Raise the Vehicle
- Step 7: Remove the Flat Tire
- Step 8: Mount the Spare Tire
- Step 9: Tighten in a Star Pattern
- Step 10: Lower the Car and Final Torque
- Step 11: Check the Spare’s Pressure
- Step 12: Stow Everything and Get Rolling
- Driving on a Spare: What You Need to Know
- What to Do with the Flat Tire
- Common Mistakes to Avoid
- When to Call for Help Instead
- FAQ
- Final Thoughts
What This Guide Will (and Won’t) Cover
This guide is for passenger cars and light trucks — sedans, SUVs, crossovers, and pickup trucks with a conventional full-size or temporary spare (donut). If you drive a vehicle with run-flat tires, no spare at all (some newer EVs), or a tire inflation kit instead of a spare, I’ll flag those situations as they come up.
Before You Ever Need This: The Preparedness Check
I always say the worst time to figure out your spare situation is when you’re already stranded. Take five minutes right now, or the next time you’re out by your car, and confirm three things:
- You have a spare. Pop the trunk or check under the bed/chassis. Some modern vehicles — especially EVs and certain sport models — ship without one.
- Your spare is inflated. Spare tires lose pressure over time. Ideally, check it every few months. A spare sitting at 15 PSI is almost as useless as no spare at all.
- Your jack and lug wrench are in the car. They can migrate to the garage and never come back.
What You’ll Need to Change a Flat Tire
Most cars come with everything you need at the factory. Here’s what should be in your kit:
| Tool | Purpose |
|---|---|
| Spare tire (full-size or donut) | Replacement wheel |
| Scissor jack or hydraulic floor jack | Lifting the vehicle |
| Lug wrench (often a cross wrench) | Removing and installing lug nuts |
| Vehicle owner’s manual | Jack point locations |
| Wheel wedges / chocks | Prevent rolling |
| Flashlight or headlamp | Night or low-light situations |
| Reflective triangles or road flares | Alerting other drivers |
| Nitrile gloves | Keep your hands clean |
| Torque wrench | Getting lug nuts to spec |
The torque wrench is the one item most people skip, and I get it — it’s not included with the car. But I’ve seen lug nuts that were under-torqued fall off on the highway, and over-torqued studs snap during the next tire rotation. If you’re going to do this right, a basic click-style torque wrench costs about $25 and is worth every penny.
Step 1: Get to Safety First — Don’t Rush the Stop
The moment you feel or hear a flat (that telltale thumping, pull to one side, or sudden loss of vehicle control), your first job is to stay calm and get to a safe location.
- Don’t brake hard. Grip the wheel firmly and ease off the gas gradually.
- Turn on your hazard lights immediately.
- Look for the safest nearby pullout — a wide shoulder, a parking lot entrance, a side street. Driving on a flat for a short additional distance to reach safety is far better than stopping in a live lane.
- On a highway: Get as far right as possible, ideally onto an exit ramp if one is close. Never change a tire in a travel lane.
Once stopped, put the car in Park (automatic) or first gear (manual), engage the parking brake, and turn the wheels toward the curb or guardrail if you’re on a hill.
Step 2: Set Up Your Safety Zone
Before you touch the tire, establish a safety perimeter.
- Place reflective triangles or road flares at least 10 feet behind the car, and another at 100 feet if traffic is moving fast.
- Put on a high-visibility vest if you have one. If not, stay on the shoulder side of the car at all times — away from traffic.
- Never get under a vehicle supported only by a scissor jack. Those factory jacks are for tire changes only, not extended work under the car.
Step 3: Get Your Equipment Out
Retrieve the spare, jack, and lug wrench from the trunk or undercarriage. On trucks, the spare is often stored under the bed — check your owner’s manual for the release mechanism if you haven’t done it before.
Lay everything out within arm’s reach before you start.
Step 4: Loosen the Lug Nuts Before You Jack
This is one of the most commonly skipped steps, and it causes real problems. If the tire is in the air when you try to break the lug nuts loose, the wheel just spins. You need the tire on the ground to provide resistance.
Use the lug wrench (or breaker bar if you have one) to break each lug nut loose by turning counterclockwise. You don’t need to remove them yet — just get them to where they turn freely with moderate hand pressure.
If the lug nuts won’t budge: Try placing the wrench on the nut and using your foot to apply downward pressure. Your bodyweight is significantly more than your arm strength. Just be careful not to slip or lose balance.
On aluminum wheels: Be careful not to scratch the finish with an ill-fitting wrench socket. A good fit matters.
Step 5: Position the Jack Correctly
This step is where real damage can happen if you get it wrong. Jacking from the wrong spot can crush rocker panels, crack plastic body trim, or — worst case — let the car slip off the jack.
Find the jack points. Every vehicle has designated reinforced lift points, usually indicated by a small notch or arrow along the pinch weld (the seam running under the door sills). Your owner’s manual will show the exact locations. When in doubt, look for a small triangular cutout or rib reinforcement in the metal just behind the front wheels or in front of the rear wheels.
If you’re using the factory scissor jack, there’s typically a saddle or cup at the top that fits into that pinch weld notch. Line it up carefully.
On frame-based trucks and body-on-frame SUVs: You have more flexibility — you can jack under the frame rails or even the differential with a proper floor jack. Still consult the manual.
Step 6: Raise the Vehicle
Turn the jack handle (or pump the floor jack) to raise the car. You need to lift until the flat tire is roughly 6 inches off the ground — enough clearance to remove the flat and fit the (often slightly taller) inflated spare.
Raise slowly and watch the jack at each stage to make sure it’s seated correctly and the car isn’t leaning or shifting.
Never crawl under the car at this point. If you drop something underneath, let it stay there until the car is back on the ground.
Step 7: Remove the Flat Tire
Now fully remove the lug nuts you loosened in Step 4. Place them somewhere safe — your pocket, a small cup, or on the hub cap if you set it aside. Losing a lug nut on the shoulder of a busy road is a genuinely miserable experience.
Pull the flat tire straight off the hub. These can be heavier than they look, especially on trucks and SUVs. Take care of your back — bend your knees, not your waist.
Set the flat tire flat on the ground next to the car, out of the way.
Step 8: Mount the Spare Tire
Lift the spare onto the hub and align the mounting holes with the wheel studs. This alignment can be tricky — the spare is heavy and you’re working at an awkward angle.
A helpful trick: Insert one or two lug nuts loosely by hand first to hold the wheel in place while you align the remaining holes. This frees your hands.
Once the spare is seated flush against the hub, hand-thread all the lug nuts clockwise. Do not use the wrench yet. Just get them snug with your fingers.
Step 9: Tighten in a Star Pattern
Here’s where most people get it wrong: they tighten lug nuts in a circle, going from one to the adjacent one. Don’t do this. It can cause the wheel to seat unevenly, leading to wobble, vibration, and in extreme cases, the wheel coming off.
Instead, tighten in a star (or cross) pattern, working across the wheel to the roughly opposite nut each time. For a 5-lug wheel, that means going: top, then bottom-right, then upper-left, then lower-right, then upper-right. The exact sequence varies by lug count, but the principle is the same — always skip to the roughly opposite stud.
Lug counts and sequence:
- 4-lug: Go diagonally (1→3→2→4)
- 5-lug: Star pattern (1→3→5→2→4)
- 6-lug: Opposite pairs (1→4→2→5→3→6)
At this stage, just get the nuts firmly snug with the lug wrench. Don’t fully torque yet — the tire is still in the air.
Step 10: Lower the Car and Final Torque
Lower the vehicle slowly until the tire is fully supporting the car’s weight but the jack is still partially engaged. Give the lug nuts one more firm turn each in the same star pattern.
Then lower fully and remove the jack.
If you have a torque wrench: Now is the time to use it. Most passenger cars spec lug nuts at 80–100 ft-lbs; trucks often call for 100–140 ft-lbs. Check your owner’s manual or door jamb sticker for the exact spec. Torque them down in the same star sequence.
If you don’t have a torque wrench: Tighten firmly with the lug wrench — “as tight as you can get with moderate effort.” Then go directly to a shop to have them torqued correctly. This is especially critical with a full-size spare you’ll be driving on for more than a few miles.
Step 11: Check the Spare’s Pressure
Before you pull back onto the road, check the spare’s pressure if you have a gauge in the car. Many roadside air compressors (sold for around $30) can help here.
Full-size spare: Inflate to the same pressure as your other tires (found on the driver’s door jamb sticker, NOT on the tire sidewall).
Donut spare (temporary spare): Most are rated for 60 PSI — significantly higher than a regular tire. Underinflating a donut is a common mistake that shortens its already limited usable life.
Step 12: Stow Everything and Get Rolling
Load the flat tire, jack, lug wrench, and any other tools into the trunk. Make sure nothing is loose or able to roll around — an unsecured jack is a hazard in the cabin.
Do a quick visual walk-around: lug nuts look seated, wheel sits flush, no obvious concerns.
Then get back on the road — but read the next section first.
Driving on a Spare: What You Need to Know
Full-Size Spare
If your car came with a full-size matching spare, you’re in relatively good shape. Drive normally, but get the flat repaired or replaced as soon as reasonably possible — you’re back to zero backup if you get another flat.
Temporary / Donut Spare
This is where I see the most misunderstanding from drivers.
| Spec | Typical Donut Limit |
|---|---|
| Max speed | 50 mph |
| Max distance | 50–70 miles |
| Highways | Avoid where possible |
| Highway on-ramps | Use with care — reduced traction |
| AWD/4WD vehicles | Get to a shop immediately |
A critical note for AWD drivers: Running a significantly smaller donut spare on an AWD vehicle stresses your drivetrain — the system expects all four tires to rotate at similar speeds. If you must use a donut, disengage AWD if possible and drive slowly to the nearest shop. This isn’t being overly cautious; it’s avoiding a potentially expensive differential repair.
What to Do with the Flat Tire
A flat isn’t always a death sentence for the tire. Here’s how I triage:
Can it likely be repaired?
- Puncture is in the center tread area (not the shoulder or sidewall)
- The puncture is smaller than ¼ inch in diameter
- The tire hasn’t been driven on while flat (running on a flat at speed destroys the sidewall internally)
Replace it:
- Sidewall damage (bubbles, cuts, or punctures on the sidewall are non-repairable — full stop)
- Shoulder damage
- Multiple punctures in close proximity
- Tire has been driven on while flat
A proper plug-and-patch repair from a reputable shop typically costs $25–$35. Don’t let anyone sell you just a plug — a patch from the inside is the industry-correct repair per the Rubber Manufacturers Association (RMA) standard.
Common Mistakes to Avoid
I’ve watched people make these errors firsthand, and a few of them I made myself early on:
1. Skipping the star tightening pattern. I mentioned this above, but it’s worth repeating. Circular tightening is the most common error and causes the most downstream problems.
2. Forgetting to check spare pressure. A deflated spare is discovered at the worst possible moment.
3. Exceeding donut speed/distance limits. The 50 mph / 50–70 mile rule exists because donuts use different rubber compounds, shallower tread, and narrower profiles than full tires. They’re designed for emergency use only.
4. Leaving the flat in the trunk and forgetting about it. I’ve met people running on a repaired tire with a flat still rolling around in the trunk. Get it fixed.
5. Over-tightening with an impact wrench at a shop. This one’s on shops, not drivers — but it leaves lug nuts virtually impossible to remove with a hand wrench roadside. If you know a shop tends to do this, ask them to torque by hand or use a torque stick.
6. Using the wrong jack point. Always consult your owner’s manual. A crushed rocker panel repair is easily $500–$1,500.
When to Call for Help Instead
Not every situation calls for a DIY fix. Call roadside assistance if:
- You’re on a busy highway with no safe shoulder and can’t reach a safe exit
- It’s dark and you’re in an unfamiliar or unsafe area
- You have a medical condition that makes lifting or crouching unsafe
- Your vehicle is an EV without a spare (inflation kits handle small punctures only — not blowouts)
- You can’t safely remove the lug nuts with the tools available
AAA, roadside coverage through your insurance, or manufacturer-provided roadside assistance (many brands include it for the first few years) are all solid options. There’s no award for handling it alone when conditions are dangerous.
FAQ
How long does it take to change a flat tire?
With practice and the right tools, 15–20 minutes is realistic for most drivers on a safe, flat surface. Your first time may take 30–40 minutes, and that’s completely normal. The more prepared you are, the faster it goes.
Can I change a tire by myself?
Yes, in most cases. The heaviest part is handling the tires themselves, particularly on trucks and SUVs. If you have a physical limitation, don’t hesitate to call for help.
Do I need to replace all four tires if one goes flat?
On most front-wheel-drive and rear-wheel-drive vehicles, no. Replace just the damaged tire (or repaired tire if the flat is repairable). On AWD/4WD vehicles, replacing only one tire can cause tread depth mismatches that stress the drivetrain — consult your owner’s manual, and many AWD manufacturers recommend keeping all four tires within ⅔ of an inch in tread depth.
Can a flat tire be repaired, or does it need to be replaced?
Depends entirely on the damage. Tread-area punctures smaller than ¼ inch can be properly plug-patched. Sidewall damage, shoulder punctures, and tires driven on while flat must be replaced. See the section above for full details.
What if I have a TPMS warning light but the tire looks okay?
After mounting a spare, your TPMS (Tire Pressure Monitoring System) warning light will likely come on, especially if the spare doesn’t have a TPMS sensor. This is normal and expected. The light should reset once all four corners have properly inflated tires with sensors reinstalled.
How do I know if my spare tire is still good?
Check the DOT date code on the sidewall (last four digits — week and year of manufacture). Most tire manufacturers recommend replacing spare tires after 6–10 years regardless of mileage or visible condition. The rubber degrades internally over time.
Final Thoughts
Changing a flat tire is one of those skills that feels intimidating until you’ve done it once. After that first time — even if it’s slow and messy — the process clicks and you realize it’s genuinely manageable for most people.
The two things I’d leave you with: check your spare before you need it, and tighten in a star pattern. Get those two habits in place, and you’ll handle a flat on the side of the road without the panic that catches most people off guard.
If this article helped you, check out our guide on how to read tire sidewall markings and what TPMS sensors do and when they fail — both are worth knowing before your next set of tires.
Have a question about changing a flat I didn’t cover? Drop it in the comments below — I read every one.